Keeping Windows up to date helps ensure your VPS has the latest security fixes, system improvements, and important bug fixes. Regular updates can also help maintain the stability and security of your VPS.
This guide walks you through checking for available Windows updates, installing them, and restarting your VPS when required. The steps may vary slightly depending on the Windows version installed on your VPS.
Before you start: Save your work and close any applications or trading platforms running on the VPS. Some Windows updates require a restart, which may temporarily disconnect your VPS and stop applications or automated processes.
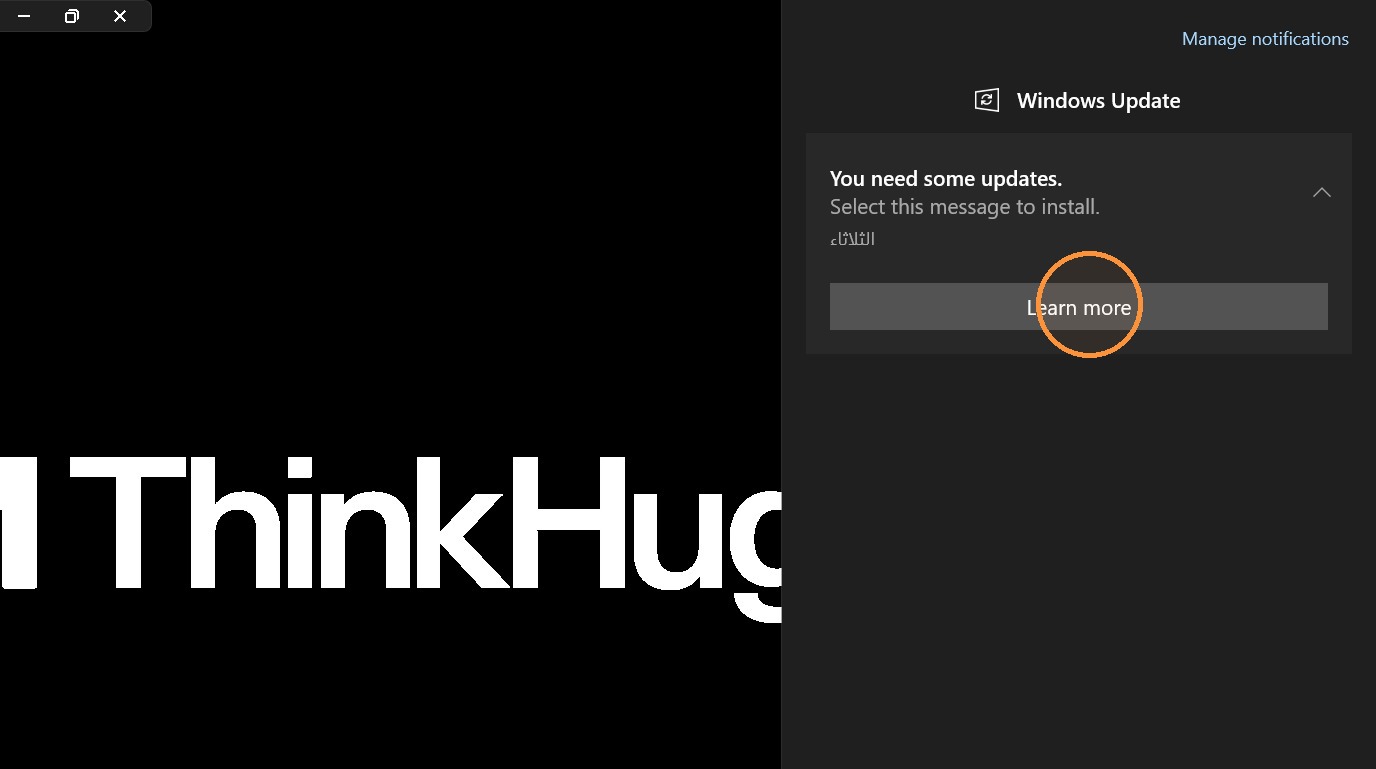
Step 1. Connect to your ThinkHuge VPS using Remote Desktop (RDP) and click on the notification panel.

Step 2. Click the Windows Update notification panel
Step 3. Check if there's Updates available then click on Install Now
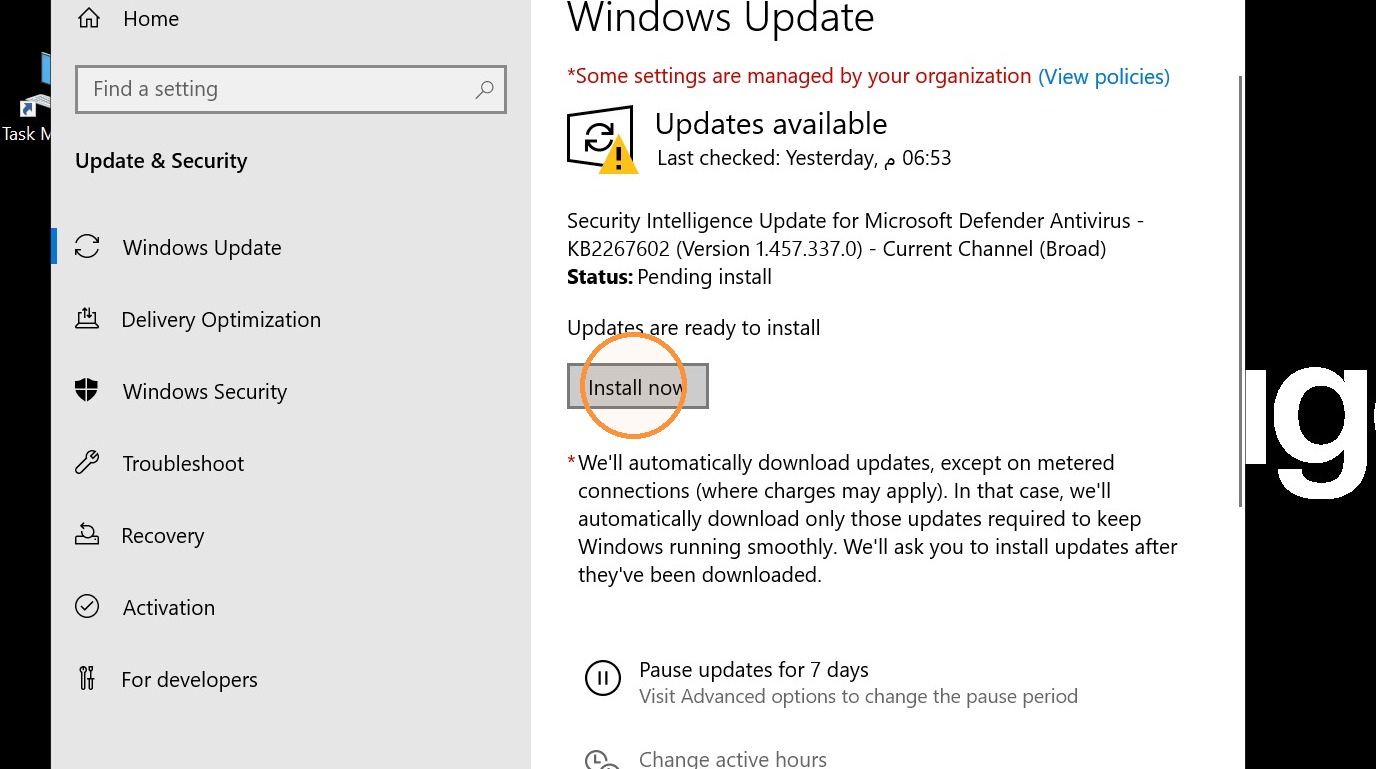
Wait for the installation to complete. Avoid disconnecting or shutting down the VPS while updates are being installed.
Step 5. Confirm that Windows shows the latest updates as installed. It should say you're up to date if you have the latest version.
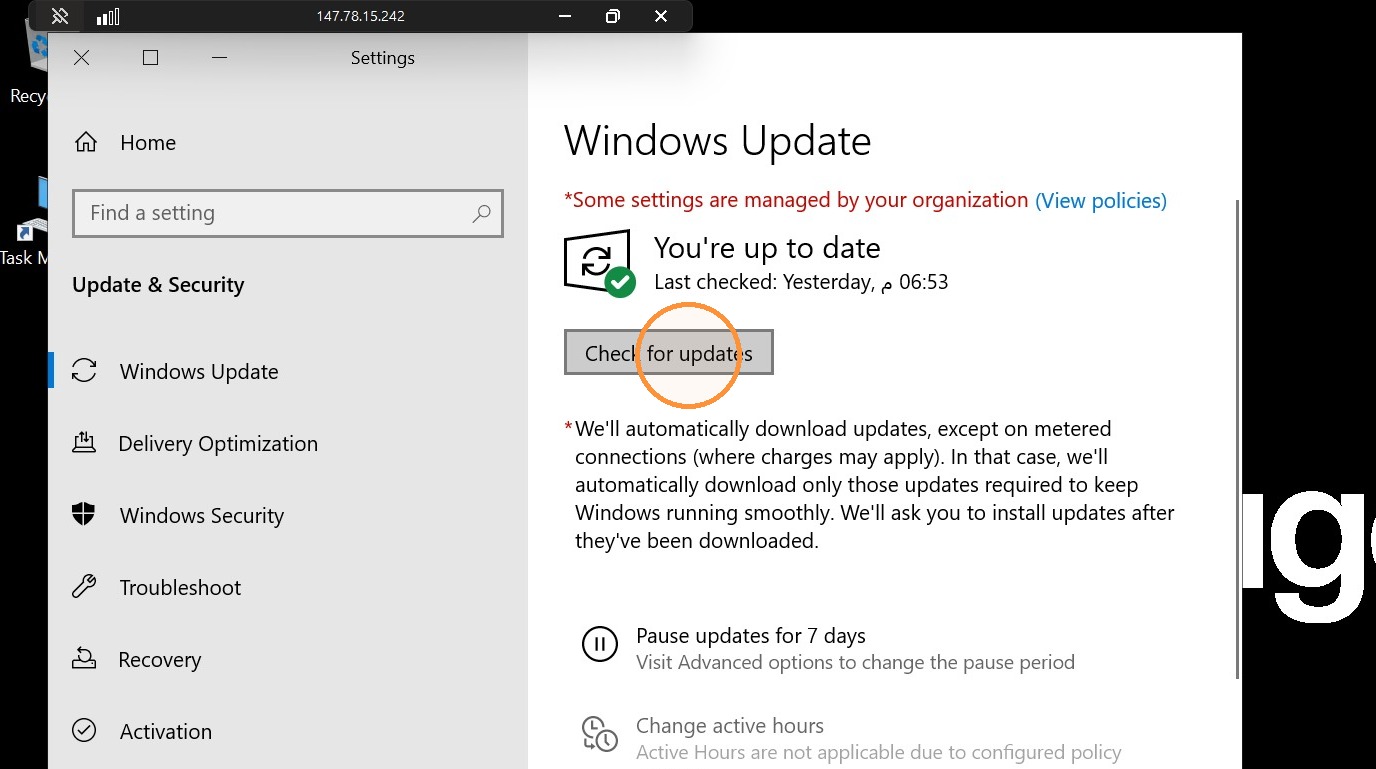
Important: Depending on the number and size of the updates, your VPS may take several minutes or considerably longer hours to finish the process. If the VPS disconnects during the update or shows an update/restart screen, do not force a shutdown. Give Windows enough time to complete the installation.
Was this article helpful?
That’s Great!
Thank you for your feedback
Sorry! We couldn't be helpful
Thank you for your feedback
Feedback sent
We appreciate your effort and will try to fix the article